2011 年 10 月 のアーカイブ

AndroidとTwitter4Jで公式画像アップロードAPIを使う


Twitter4Jが2.2.5になって、Twitter APIのstatuses/update_with_mediaが使えるようになったというので、さっそく実験してみました。

Twitter4J 2.2.5 released – Twitter4J | Google グループ

とりあえずダウンロードして解凍します。twitter4j-android-2.2.5.zipの方です。

http://twitter4j.org/en/index.html#download

Eclipseで適当にプロジェクト作ります。プロジェクト作ったらプロジェクトのプロパティを開いて、Java Build Pathの設定画面を表示します。

image

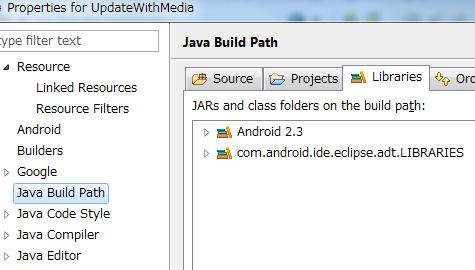
Librariesタブを開いて、Add External JARsをクリックします。

image

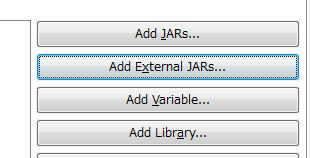
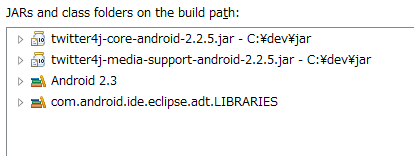
先ほど展開したフォルダから、libの下にあるtwitter4j-core-android-2.2.5.jarとtwitter4j-media-support-android-2.2.5.jarを選択してJARを取り込みます。

image

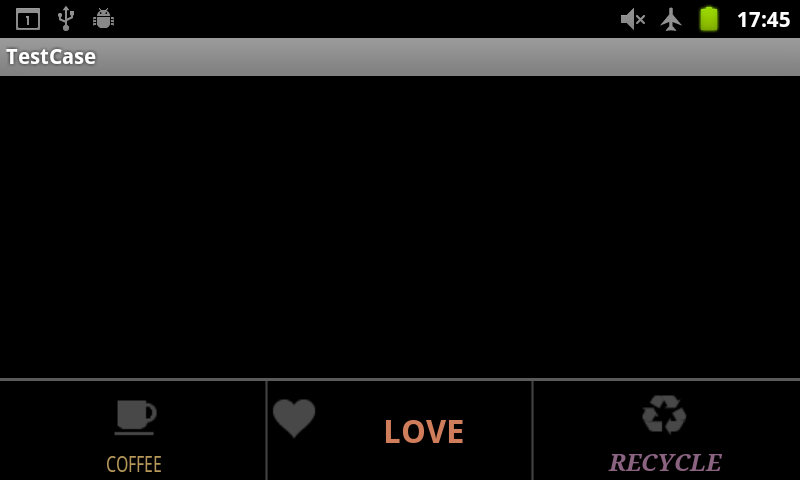
あとはこんな感じで実験。ギャラリーの画像を選択してメッセージつけてポストします。

UpdateWithMediaActivity.java

package info.loadlimits.android.updatewithmedia;

import java.io.File;

import twitter4j.TwitterException;
import twitter4j.conf.Configuration;
import twitter4j.conf.ConfigurationBuilder;
import twitter4j.media.ImageUpload;
import twitter4j.media.ImageUploadFactory;
import android.app.Activity;
import android.content.ContentResolver;
import android.content.Intent;
import android.database.Cursor;
import android.net.Uri;
import android.os.Bundle;
import android.provider.MediaStore;
import android.view.View;
import android.view.View.OnClickListener;
import android.widget.Button;
import android.widget.EditText;

public class UpdateWithMediaActivity extends Activity implements
		OnClickListener {
	private final static int REQUEST_PICK = 1;
	private final static String CONSUMER_KEY = "(書き換えてください)";
	private final static String CONSUMER_SECRET = "(書き換えてください)";
	private final static String ACCESS_TOKEN = "(書き換えてください)";
	private final static String ACCESS_TOKEN_SECRET = "(書き換えてください)";

	@Override
	public void onCreate(Bundle savedInstanceState) {
		super.onCreate(savedInstanceState);
		setContentView(R.layout.main);

		Button buttonPost = (Button) findViewById(R.id.buttonPost);
		buttonPost.setOnClickListener(this);
	}

	@Override
	public void onClick(View v) {
		Intent intent = new Intent(Intent.ACTION_PICK);
		intent.setType("image/*");
		startActivityForResult(intent, REQUEST_PICK);
	}

	@Override
	protected void onActivityResult(int requestCode, int resultCode, Intent data) {
		super.onActivityResult(requestCode, resultCode, data);
		if (requestCode == REQUEST_PICK && resultCode == RESULT_OK) {
			Uri uri = data.getData();
			ContentResolver cr = getContentResolver();
			String[] columns = { MediaStore.Images.Media.DATA };
			Cursor c = cr.query(uri, columns, null, null, null);

			c.moveToFirst();
			File path = new File(c.getString(0));
			if (!path.exists())
				return;

			ConfigurationBuilder builder = new ConfigurationBuilder();
			builder.setOAuthConsumerKey(CONSUMER_KEY);
			builder.setOAuthConsumerSecret(CONSUMER_SECRET);
			builder.setOAuthAccessToken(ACCESS_TOKEN);
			builder.setOAuthAccessTokenSecret(ACCESS_TOKEN_SECRET);
			// ここでMediaProviderをTWITTERにする
			builder.setMediaProvider("TWITTER");

			Configuration conf = builder.build();

			ImageUpload imageUpload = new ImageUploadFactory(conf)
					.getInstance();

			EditText textTweet = (EditText) findViewById(R.id.textTweet);
			String tweet = textTweet.getText().toString();

			try {
				imageUpload.upload(path, tweet);
			} catch (TwitterException e) {
				e.printStackTrace();
			}
		}
	}
}

res/layout/main.xml

<?xml version="1.0" encoding="utf-8"?>
<LinearLayout xmlns:android="http://schemas.android.com/apk/res/android"
    android:layout_width="fill_parent"
    android:layout_height="fill_parent"
    android:orientation="vertical" >

    <EditText
        android:id="@+id/textTweet"
        android:layout_width="match_parent"
        android:layout_height="wrap_content" >

        <requestFocus />
    </EditText>

    <Button
        android:id="@+id/buttonPost"
        android:layout_width="wrap_content"
        android:layout_height="wrap_content"
        android:text="@string/btn_upload" />

</LinearLayout>

manifest

<?xml version="1.0" encoding="utf-8"?>
<manifest xmlns:android="http://schemas.android.com/apk/res/android"
    package="info.loadlimits.android.updatewithmedia"
    android:versionCode="1"
    android:versionName="1.0" >

    <uses-sdk android:minSdkVersion="9" />

    <uses-permission android:name="android.permission.INTERNET" />

    <application
        android:icon="@drawable/ic_launcher"
        android:label="@string/app_name" >
        <activity
            android:label="@string/app_name"
            android:name=".UpdateWithMediaActivity" >
            <intent-filter >
                <action android:name="android.intent.action.MAIN" />

                <category android:name="android.intent.category.LAUNCHER" />
            </intent-filter>
        </activity>
    </application>

</manifest>

ポイントはsetMediaProviderでTWITTERを選択することだけです。

image

image

こんな感じでpic.twitter.comにアップロードできました。

OAuth認証ページとか組み込みたければ、こちらを参考に。

[Android] Android+Twitter4JでOAuthするためのソースコード – adakoda


オプションメニューのアイコンと文字を横並びにしたかった


前回オプションメニューの文字色とフォントを変更するエントリを書きましたが、アイコンの隣に文字を表示したい要件が出てきました。

前回
OptionsMenuの文字色を変更する : blog.loadlimit – digital matter –

で、色々やってみましたが、手詰まりしてしまいました。やっぱりアイコンと文字をセットにした画像を用意してしまって、文字は消してしまう方が確実です。

惜しいところまで行った現状の記録を残しておきます。

device-2011-10-22-174653

なんですかね、心が離れてしまったんですかね。

ソース

public class CustomizedMenuActivity extends Activity {
	public static final int MENU_ID_COFFEE = 1;
	public static final int MENU_ID_LOVE = 2;
	public static final int MENU_ID_RECYCLE = 3;

	@Override
	public void onCreate(Bundle savedInstanceState) {
		super.onCreate(savedInstanceState);
		setContentView(R.layout.customized_menu);
	}

	protected TextView getMenuItemView(MenuItem item) {
		try {
			Class<?> c = item.getClass(); // MenuItemImplのインスタンス
			Class<?>[] paramTypesGetItemView = { int.class, ViewGroup.class };
			Method method;
			method = c.getDeclaredMethod("getItemView", paramTypesGetItemView);
			// getItemViewはprivateメソッドなのでアクセス可能に変更する
			method.setAccessible(true);
			// IconMenuItemViewを取得できる
			TextView view = (TextView) method.invoke(item, new Object[] { 0,
					null });
			return view;
		} catch (SecurityException e) {
			e.printStackTrace();
		} catch (NoSuchMethodException e) {
			e.printStackTrace();
		} catch (IllegalArgumentException e) {
			e.printStackTrace();
		} catch (IllegalAccessException e) {
			e.printStackTrace();
		} catch (InvocationTargetException e) {
			e.printStackTrace();
		}
		return null;
	}

	@Override
	public boolean onCreateOptionsMenu(Menu menu) {
		// メニューアイテムの追加
		MenuItem menuItemCoffee = menu.add(Menu.NONE, MENU_ID_COFFEE,
				Menu.NONE, this.getText(R.string.menu_coffee)).setIcon(
				R.drawable.icon_coffee);
		MenuItem menuItemLove = menu.add(Menu.NONE, MENU_ID_LOVE, Menu.NONE,
				this.getText(R.string.menu_love)).setIcon(R.drawable.icon_love);
		MenuItem menuItemRecycle = menu.add(Menu.NONE, MENU_ID_RECYCLE,
				Menu.NONE, this.getText(R.string.menu_recycle)).setIcon(
				R.drawable.icon_recycle);

		try {
			TextView viewCoffee = getMenuItemView(menuItemCoffee);
			TextView viewLove = getMenuItemView(menuItemLove);
			TextView viewRecycle = getMenuItemView(menuItemRecycle);

			// テキストの色を変える
			viewCoffee.setTextColor(0xFFB5985A);
			viewCoffee.setTextSize(14);
			viewCoffee.setTextScaleX(0.8f);

			viewLove.setTextColor(0xFFCF7D5B);
			viewLove.setTextSize(22);
			viewLove.setTypeface(Typeface.DEFAULT_BOLD);

			viewRecycle.setTextColor(0xFF8A6381);
			viewRecycle.setTextSize(16);
			viewRecycle.setTypeface(Typeface.create(Typeface.SERIF,
					Typeface.BOLD_ITALIC));

			// アイコン画像を取得
			Field field = viewLove.getClass().getDeclaredField("mIcon");
			field.setAccessible(true);
			Drawable icon = (Drawable) field.get(viewLove);
			// アイコンの描画領域を取得
//			Rect iconRect = icon.getBounds();
//			iconRect.left += 50;
//			iconRect.right += 50;
//			icon.setBounds(iconRect); // ※IconMenuItemViewクラスのonLayoutで上書きされてしまう
			// アイコンを文字の左側に表示する
			viewLove.setCompoundDrawables(icon, null, null, null);
			// 文字の配置を中央寄せにする
			viewLove.setGravity(Gravity.CENTER_VERTICAL
					| Gravity.CENTER_HORIZONTAL);

		} catch (NoSuchFieldException e) {
			e.printStackTrace();
		} catch (SecurityException e) {
			e.printStackTrace();
		} catch (IllegalArgumentException e) {
			e.printStackTrace();
		} catch (IllegalAccessException e) {
			e.printStackTrace();
		}

		return super.onCreateOptionsMenu(menu);
	}

}

問題はIconMenuItemViewクラスでpositionIconメソッドがアイコンの位置を決定しているのですが、onLayoutのタイミングで呼び出されるので、上書きされてしまうようなのですね。

ActivityのViewでonLayoutをオーバーライドして、うまくいけばアイコンが描画される前に位置変更差し込めるのかなぁ?

ちょっともう面倒なので画像にしてしまいます。

icon_love2

device-2011-10-22-182542

あ、いいですね。まずは画像登録とテキストを空に。

		MenuItem menuItemLove = menu.add(Menu.NONE, MENU_ID_LOVE, Menu.NONE,
				null).setIcon(R.drawable.icon_love2);

文字の分の空白が下に空いてしまうので、文字サイズを1にしておきます。0は効かないようです。

viewLove.setTextSize(1);

これで一応できました。

MenuView.ItemViewを実装すればこんな事しなくてもViewをまるごとカスタマイズできるのかな…

ちょっともう少し調べてみます。

Menu::add→Menu::addInternal→new MenuItemImpl

で、MenuItemImplのgetItemViewを呼び出したタイミングでMenuItemImpl::createItemViewが呼び出されます。

    private MenuView.ItemView createItemView(int menuType, ViewGroup parent) {
        // Create the MenuView
        MenuView.ItemView itemView = (MenuView.ItemView) getLayoutInflater(menuType)
                .inflate(MenuBuilder.ITEM_LAYOUT_RES_FOR_TYPE[menuType], parent, false);
        itemView.initialize(this, menuType);
        return itemView;
    }

getLayoutInflaterは同じクラスのメソッド。

    public LayoutInflater getLayoutInflater(int menuType) {
        return mMenu.getMenuType(menuType).getInflater();
    }

リフレクションで呼んで何が返ってくるのか見て見ました。menuTypeはアイコンメニューなので0。

			Class<?>[] param = {int.class};
			method = c.getDeclaredMethod("getLayoutInflater", param);
			LayoutInflater mLayoutInflater = (LayoutInflater) method.invoke(item, new Object[] { 0 });
			Log.d(TAG, "" + mLayoutInflater.getClass().getName());

com.android.internal.policy.impl.PhoneLayoutInflater

public class PhoneLayoutInflater extends LayoutInflater

えー…

PhoneLayoutInflaterでinflateメソッドはオーバーライドされていないので、LayoutInflaterのinflateを見る。呼ばれたのはこれかな。

    public View inflate(int resource, ViewGroup root, boolean attachToRoot) {
        if (DEBUG) System.out.println("INFLATING from resource: " + resource);
        XmlResourceParser parser = getContext().getResources().getLayout(resource);
        try {
            return inflate(parser, root, attachToRoot);
        } finally {
            parser.close();
        }
    }

resourceは、com.android.internal.R.layout.icon_menu_item_layoutですね。

frameworks/base/core/res/res/layout/icon_menu_item_layout.xml

<com.android.internal.view.menu.IconMenuItemView xmlns:android="http://schemas.android.com/apk/res/android"
    android:id="@+id/title"
    android:layout_width="match_parent"
    android:layout_height="match_parent"
    android:paddingBottom="1dip"
    android:paddingLeft="3dip"
    android:paddingRight="3dip"
    android:singleLine="true"
    android:ellipsize="marquee"
    android:fadingEdge="horizontal" />

あー、ここにあったのか。

割り込める可能性があるとすれば、MenuItemImplクラスのgetItemViewメソッド。

    View getItemView(int menuType, ViewGroup parent) {
        if (!hasItemView(menuType)) {
            mItemViews[menuType] = new WeakReference<ItemView>(createItemView(menuType, parent));
        }
        
        return (View) mItemViews[menuType].get();
    }

つまり、mItemViewsにリフレクションで先にViewを入れておけばいいってことですかね。

うーん…


OptionsMenuの文字色を変更する


Activityで端末のメニューボタンを押したときに出てくるオプションメニューですが、文字の色が変えられなくて困っていました。

Themeのandroid:panelTextAppearanceで変えられるのかと思っていたのだけど、なぜかうまく行かず。

背景画像はテーマで変更できるのですが。

リフレクションを使ってテキストカラーの変更をしてみました。Android API 8で確認しています。

デフォルト

device-2011-10-22-120919

文字色変更

device-2011-10-22-135742

Activityのコード

public class CustomizedMenuActivity extends Activity {
	public static final int MENU_ID_COFFEE = 1;
	public static final int MENU_ID_LOVE = 2;
	public static final int MENU_ID_RECYCLE = 3;

	@Override
	public void onCreate(Bundle savedInstanceState) {
		super.onCreate(savedInstanceState);
		setContentView(R.layout.customized_menu);
	}

	private TextView getMenuItemView(MenuItem item) {
		try {
			Class<?> c = item.getClass(); // itemはMenuItemImplのインスタンス
			Class<?>[] paramTypesGetItemView = { int.class, ViewGroup.class };
			Method method = c.getDeclaredMethod("getItemView", paramTypesGetItemView);

			// getItemViewはprivateメソッドなのでアクセス可能に変更する
			method.setAccessible(true);

			// IconMenuItemViewを取得できる
			TextView view = (TextView) method.invoke(item, new Object[] { 0, null });

			return view;
		} catch (SecurityException e) {
			e.printStackTrace();
		} catch (NoSuchMethodException e) {
			e.printStackTrace();
		} catch (IllegalArgumentException e) {
			e.printStackTrace();
		} catch (IllegalAccessException e) {
			e.printStackTrace();
		} catch (InvocationTargetException e) {
			e.printStackTrace();
		}
		return null;
	}

	@Override
	public boolean onCreateOptionsMenu(Menu menu) {
		// メニューアイテムの追加
		MenuItem menuItemCoffee = menu.add(Menu.NONE, MENU_ID_COFFEE,
				Menu.NONE, this.getText(R.string.menu_coffee)).setIcon(
				R.drawable.icon_coffee);
		MenuItem menuItemLove = menu.add(Menu.NONE, MENU_ID_LOVE, Menu.NONE,
				this.getText(R.string.menu_love)).setIcon(R.drawable.icon_love);
		MenuItem menuItemRecycle = menu.add(Menu.NONE, MENU_ID_RECYCLE,
				Menu.NONE, this.getText(R.string.menu_recycle)).setIcon(
				R.drawable.icon_recycle);

		try {
			TextView viewCoffee = getMenuItemView(menuItemCoffee);
			TextView viewLove = getMenuItemView(menuItemLove);
			TextView viewRecycle = getMenuItemView(menuItemRecycle);

			// テキストの色を変える
			viewCoffee.setTextColor(0xFFB5985A);
			viewCoffee.setTextSize(14);
			viewCoffee.setTextScaleX(0.8f);

			viewLove.setTextColor(0xFFCF7D5B);
			viewLove.setTextSize(22);
			viewLove.setTypeface(Typeface.DEFAULT_BOLD);

			viewRecycle.setTextColor(0xFF8A6381);
			viewRecycle.setTextSize(16);
			viewRecycle.setTypeface(Typeface.create(Typeface.SERIF,
					Typeface.BOLD_ITALIC));

		} catch (SecurityException e) {
			e.printStackTrace();
		} catch (IllegalArgumentException e) {
			e.printStackTrace();
		}

		return super.onCreateOptionsMenu(menu);
	}
}

MenuItemの実体はMenuItemImplクラスで、getItemViewメソッドを使ってIconMenuItemViewクラスを取り出しています。

IconMenuItemViewクラスはTextViewを継承しているので、キャストすればテキストカラーやフォントサイズなどの変更ができます。

ちなみに、このあと、メニューのセパレータ(divider)画像の変更とアイコンと文字の配置の変更もやりました。それは次以降のエントリで。

オプションメニューのアイコンと文字を横並びにしたかった : blog.loadlimit – digital matter –


Cannot connect to VMと表示されてデバッグができないとき


EclipseでAndroidの開発をしていて、上記ダイアログが出て唐突にデバッグで起動できなくなったら、慌てずにそのF11を押す手を離して、パッケージマネージャのプロジェクトを選択して、Debug As Android Applicationだ。

OK?


ライブ壁紙開発時にUSBケーブルを接続しないと起動しない問題


問題というほどでもなかった。Androidのライブ壁紙作成のお話。

ライブ壁紙をステップ実行してデバッグするためにwaitForDebuggerを書いたのはいいのだけど、それを忘れてデバッグ用じゃない端末にインストールすると、一向にライブ壁紙を選択した後の「ライブ壁紙を読み込み中…」から進まない。

開発用端末でUSBケーブルを繋いでいると先に進めてしまうので、isDebuggerConnectedメソッドで分岐するようにしました。

public class MyWallpaperService extends WallpaperService {

	private final Handler handler = new Handler();

	@Override
	public Engine onCreateEngine() {
		if (android.os.Debug.isDebuggerConnected() // ここでデバッガが繋がっているか判定
				&& MyApplication.isDebuggable()) { // こっちはmanifestのdebuggableを読む実装
			android.os.Debug.waitForDebugger();    // デバッガ待機
		}
		return new MyEngine();
	}

	// do something ...

}


Androidで地磁気センサーの値が取れない問題


いや、取れないわけじゃないですけどね。SensorManager.SENSOR_STATUS_UNRELIABLEにハマった…

駄猫の備忘録: 久々にセンサーを使ってみた

XPERIA rayで方位が取れない問題があったので、調べていたところaccuracyのチェックでメソッドを抜けていたことが判明…完全に見落としてた。

	@Override
	public void onSensorChanged(SensorEvent event) {

		if (event.accuracy == SensorManager.SENSOR_STATUS_UNRELIABLE) {
			return;
		}

		switch (event.sensor.getType()) {
		case Sensor.TYPE_MAGNETIC_FIELD:
			magneticValues = event.values.clone(); // ■ここに来ない
			break;
		case Sensor.TYPE_ACCELEROMETER:
			accelerometerValues = event.values.clone();
			break;
		}

		// do something ...

	}

GALAXY Sでも方向が取れないと報告があったので多分これでしょう。

キャリブレーションすればいいのかな…


Heap updates are NOT ENABLED for this client


How to enable Heap updates on my android client – Stack Overflow

EclipseのDDMSでAndroid実機端末のヒープを見る方法のメモ。

heap1

heap2

デバイスビューの緑の筒みたいなアイコンをクリックします。

heap3

これでヒープが見られるようになります。

heap4